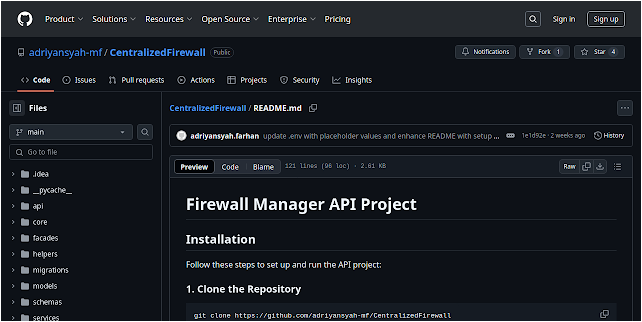
CentralizedFirewall – Provides A Firewall Manager API Designed To Centralize And Streamline The Management Of Firewall Configurations
Firewall Manager API Project
Installation
Follow these steps to set up and run the API project:
1. Clone the Repository
git clone https://github.com/adriyansyah-mf/CentralizedFirewall
cd CentralizedFirewall
2. Edit the .env File
Update the environment variables in .env according to your configuration.
nano .env
3. Start the API with Docker Compose
docker compose up -d
This will start the API in detached mode.
4. Verify the API is Running
Check if the containers are up:
docker psAdditional Commands
Stop the API
docker compose down
Restart the API
docker compose restart
Let me know if you need any modifications! 🚀
How to setup for the first time and connect to firewall client
- Install Firewall Agent on your node server
- Run the agent with the following command
sudo dpkg -i firewall-client_deb.deb
- Create a New Group on the Firewall Manager
- Create New API Key on the Firewall Manager
- Edit the configuration file on the node server
nano /usr/local/bin/config.ini
- Add the following configuration
[settings]
api_url = API-URL
api_key = API-KEY
hostname = Node Hostname (make it unique and same as the hostname on the SIEM)
- Restart the firewall agent
systemctl daemon-reload
systemctl start firewall-agent
- Check the status of the firewall agent
systemctl status firewall-agent
- You will see the connected node on the Firewall Manager
Default Credential
Username: admin
Password: admin
You can change the default credential on the setting page
How to Integration with SIEM
- Install the SIEM on your server
- Configure the SIEM to send the log to the Firewall Manager (You can do this via SOAR or SIEM configuration) The request should be POST with the following format
- The format of the log should be like this
curl -X 'POST' \
  'http://api-server:8000/general/add-ip?ip=123.1.1.99&hostname=test&apikey=apikey&comment=log' \
  -H 'accept: application/json' \
  -d ''
You can see the swagger documentation on the following link
http://api-server:8000/docs
The .env detail configuration
DB=changeme
JWT_SECRET=changeme
PASSWORD_SALT=changme
PASSWORD_TOKEN_KEY=changme
OPENCTI_URL=changme
OPENCTI_TOKEN=changme
Sponsor This Project 💖
If you find this project helpful, consider supporting me through GitHub Sponsors
Original Source: kitploit.com
A considerable amount of time and effort goes into maintaining this website, creating backend automation and creating new features and content for you to make actionable intelligence decisions. Everyone that supports the site helps enable new functionality.
If you like the site, please support us on “Patreon” or “Buy Me A Coffee” using the buttons below
To keep up to date follow us on the below channels.


![[EVEREST] - Ransomware Victim: MUSE-INSECURE: Inside Collins Aerospaces Security Failure 3 image](https://www.redpacketsecurity.com/wp-content/uploads/2024/09/image-300x300.png)
![Cobalt Strike Beacon Detected - 47[.]109[.]90[.]134:88 5 Cobalt-Strike](https://www.redpacketsecurity.com/wp-content/uploads/2021/11/Cobalt-Strike-300x201.jpg)
