Unlocking the Power of Macro Authentication: Part One

This blog post is part one in a three-part series on macro authentication.
You may have come across macro authentication when using InsightAppSec or AppSpider. When it fails, it can be a nuisance to troubleshoot, and if you’re not aware of the different components and factors of success of a macro file, this process might require time-consuming trial and error. In this blog post, we will review how various components of a macro work and what to keep in mind when recording a macro for authentication.
Let’s address the first obvious question:
Why do I need to record my authentication?
The main purpose of authentication is to provide a mechanism for authorized users to access only parts of the application that they have permission to use. Since there are different types of authentication mechanisms out there, it’s not always as simple as providing credentials and having it automatically work. We need to make sure we understand how the tokens needed to authenticate into an application are received and used when interacting with an application. It could be based entirely on client and server interactions, or may involve redirects through Active Directory or a Single Sign On service, etc. Knowing how and where to pass credentials is unfortunately not a one-size-fits-all-scenario. Recording a sequence for authentication is needed for this reason, and testing it multiple times is recommended to make sure results are consistent.
What is macro authentication?
Macro authentication is one of the methods of recording and replaying authentication available in InsightAppSec and AppSpider. It allows users to record a specific sequence of steps to successfully log in to an application. Macros can be recorded using the Rapid7 AppSec Plugin (R7AP) and is an XML file with each action recorded as a <Macro Event>.
Recording authentication sequences allows for users to define a series of steps in which the token needs to be captured for interacting with an application and can be replicated successfully during the course of a scan in the event of a session loss. This means that scanning can resume after successfully replaying a recorded authentication sequence. It is important to know how your application’s authentication sequence works to successfully create a macro for authentication. There are use cases for macro authentication outside of the ones covered in this blog post, but the most common use cases are outlined below.
When do I use a macro for authentication?
Macro authentication can be used in almost any scenario, but we want to make sure that we are using it in the appropriate places. When automating an authentication sequence, our goal is to make sure we use a process that gives us consistent results. The following are use cases for when a macro for authentication will be needed:
- If your application leverages Single Sign On.
- Applications leveraging Single Sign On tend to redirect back and forth from a few different URLs.
- If your application has more than one step or field required to interact with when logging in.
- A security question or one-time pages type prompts post authentication
- A login form requiring more information than just a simple username and password requirement at the login page, such as a First/Lastname, CompanyName, Role or any ID type field as examples
- If username and password input are on separate pages
- If your application has a heavy JavaScript presence on the front end, leveraging the likes of AngularJs, ReactJs, etc.
How do I record a macro?
Here are some basic rules to follow when using the R7AP to create a macro:
- Review the credentials and authentication sequence prior to beginning the recording to ensure that credentials are valid and you are aware of steps to successfully log in.
- Use your mouse to click only on elements and the keyboard to type into fields pertaining to the authentication sequence.
a. Note: When recording a macro, certain keyboard elements don’t translate well into an input, and may affect the recording of a macro. Buttons like Tab are an example. Only use the mouse to navigate and the keyboard to type in relevant fields. - In the case of SSO redirect, confirm and review any redirects to and from the application.
- Be aware of the context in which you are recording from versus the context in which InsightAppSec or AppSpider is viewing your application, especially with regard to networking, permissions, or authentication workflows.
- Take your time recording the authentication sequence, as the time it takes the browser to display various elements of the page might vary based on the application response time.
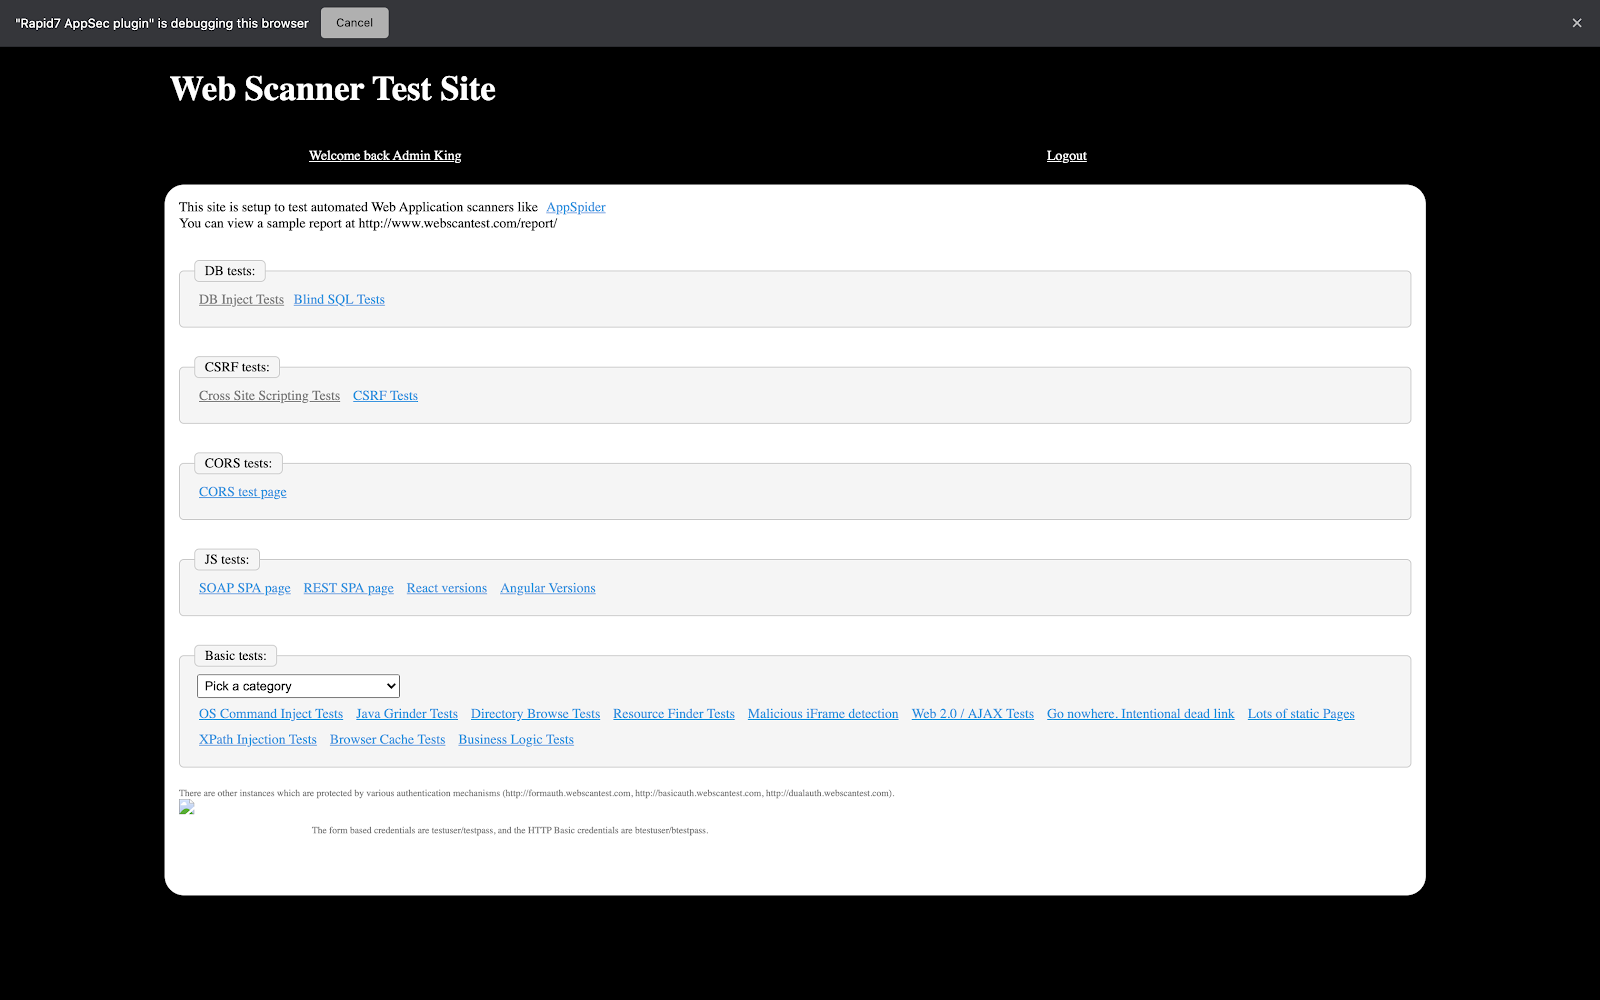
Once you have reviewed the aforementioned points,it’s time to start recording. For this example, we’ll try authentication on a vulnerable application known as WebScanTest.
- Browse to your application in Chrome, then open the R7AP.
- Find the Macro section and click on the Record Authentication button.
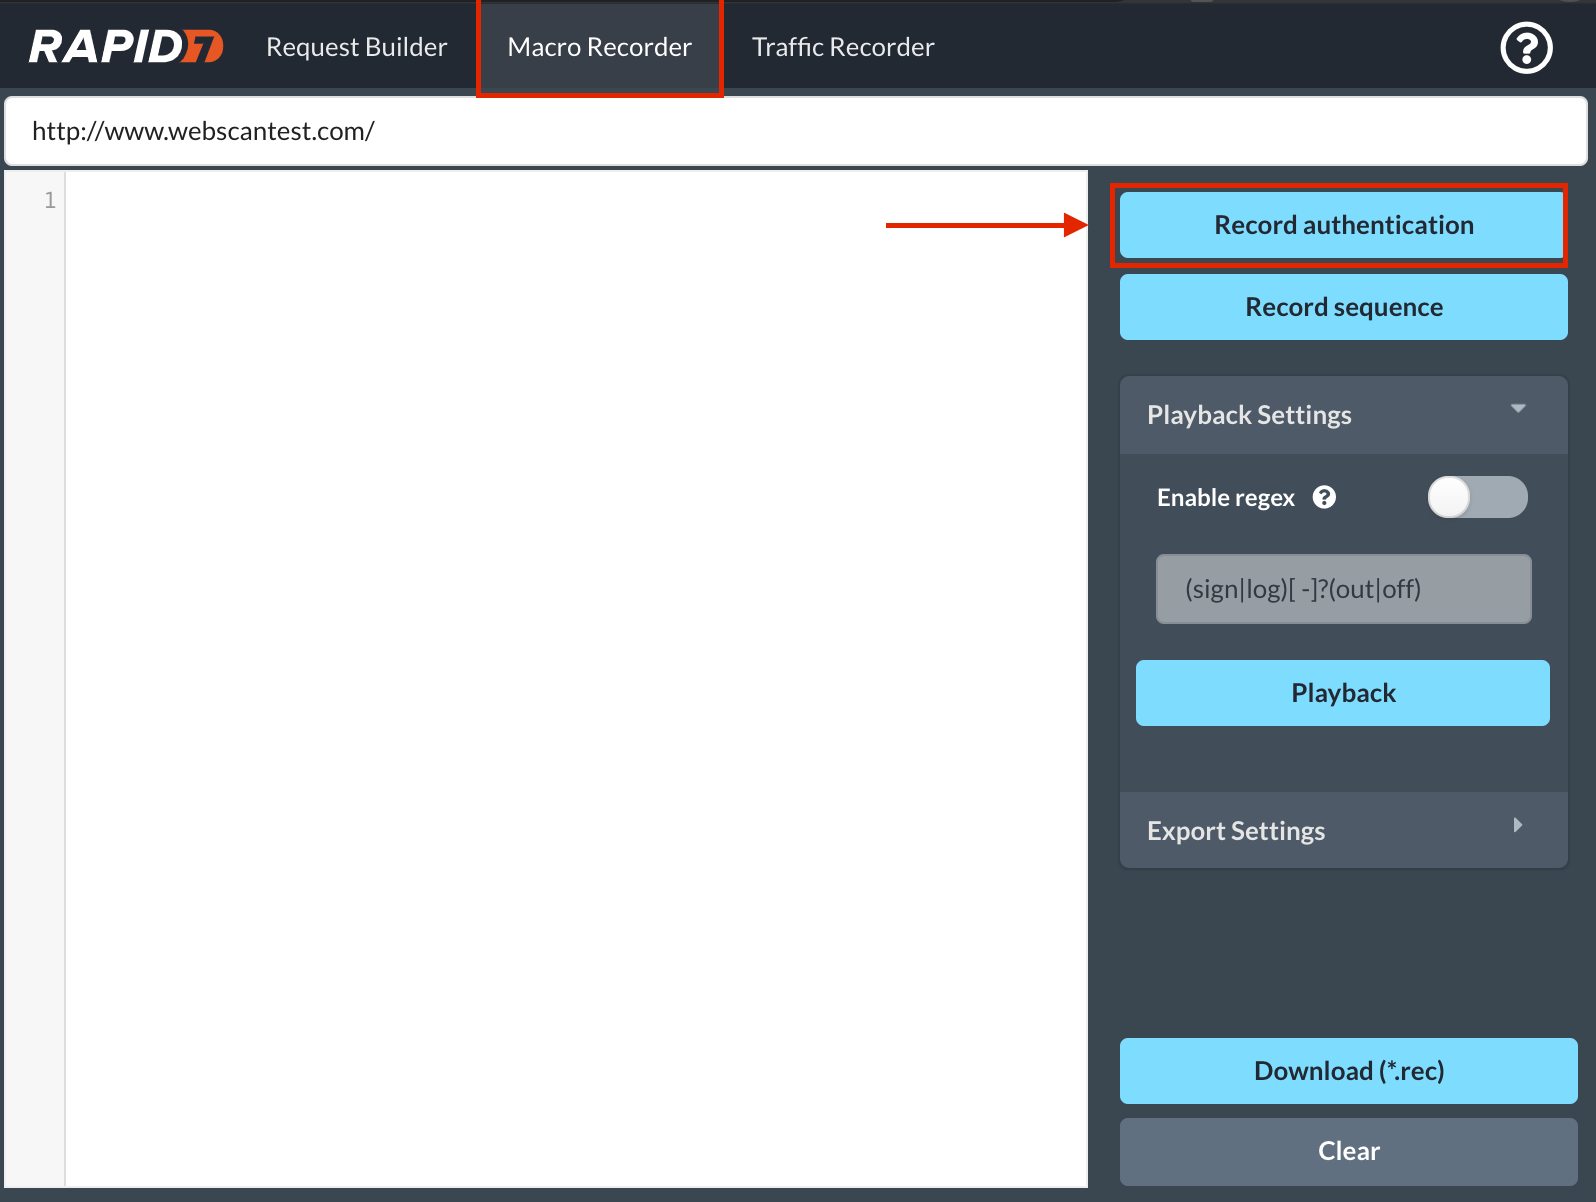
- A new browser window will appear, with a couple prompts to allow recording.
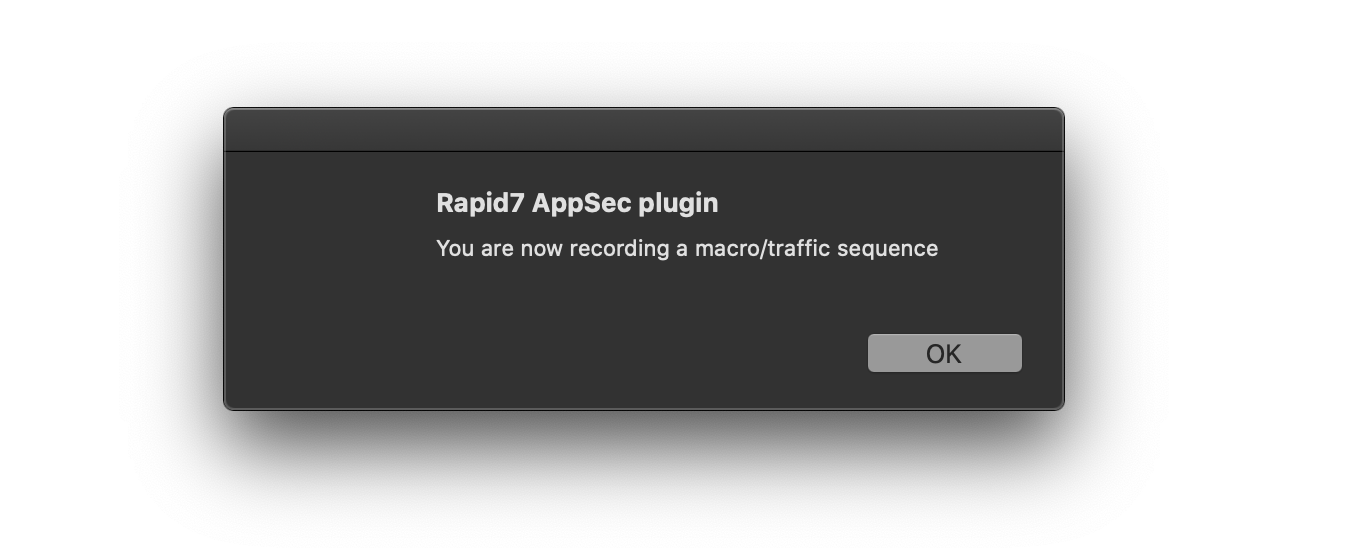
- Once you hit OK, make sure to interact and log in to your application from the newly opened browser window.
- As mentioned above, only click on elements pertaining to the authentication sequence. In this case, we need to click on “Login” to get to the login page.
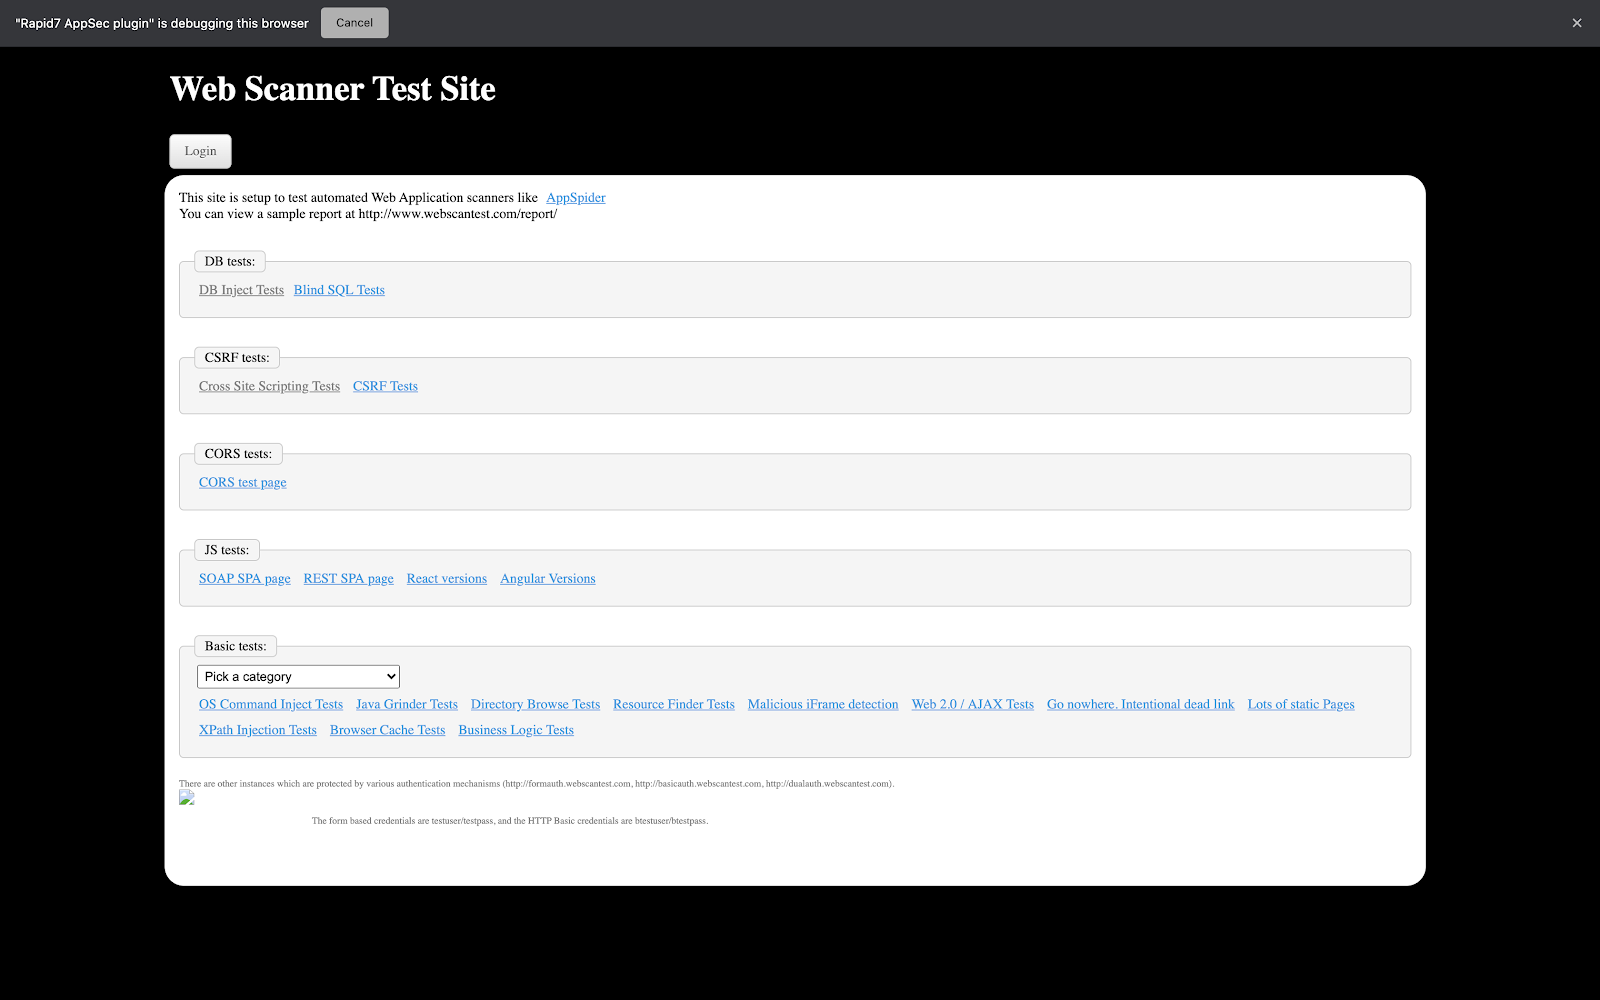
- Once you are at the login page, make sure to first click on the elements you choose to interact with.
- First, click on the Login form field to enter the username, then type in the username.
- Repeat the same steps for the Password field.
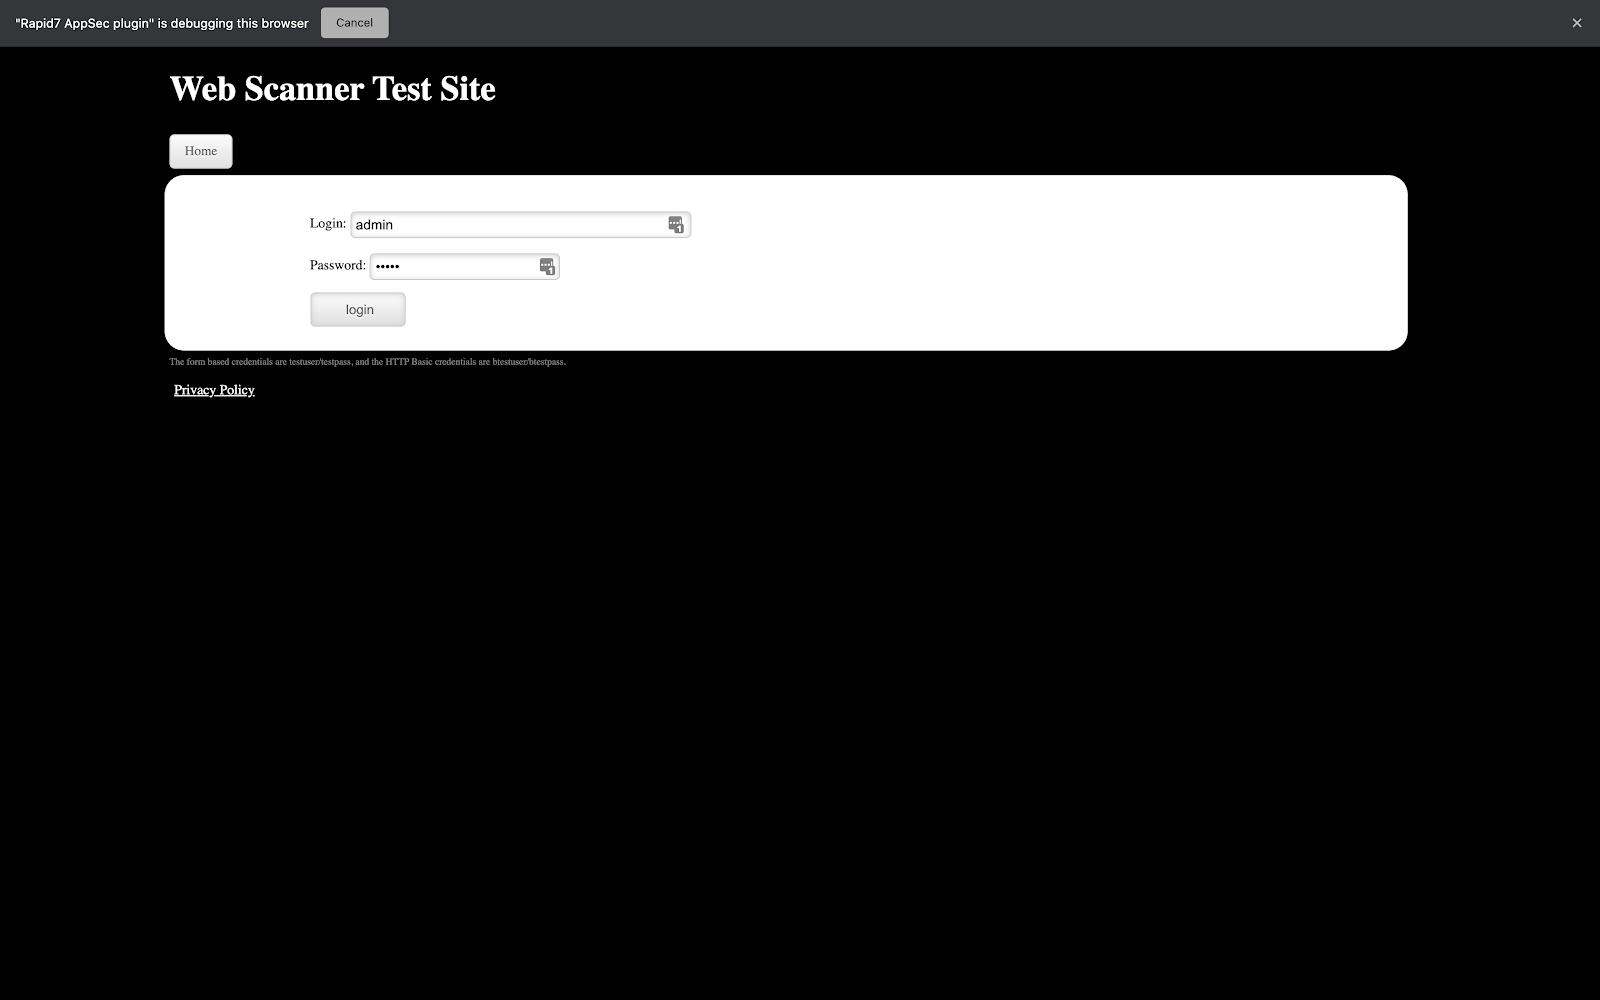
- Once successfully logged in, close out the browser window to end the recording session.
- By now, the R7AP may have disappeared, but not to worry. If the recording has been successful, once you open the R7AP and go to the Macro tab, it should display the XML content of the recorded macro.
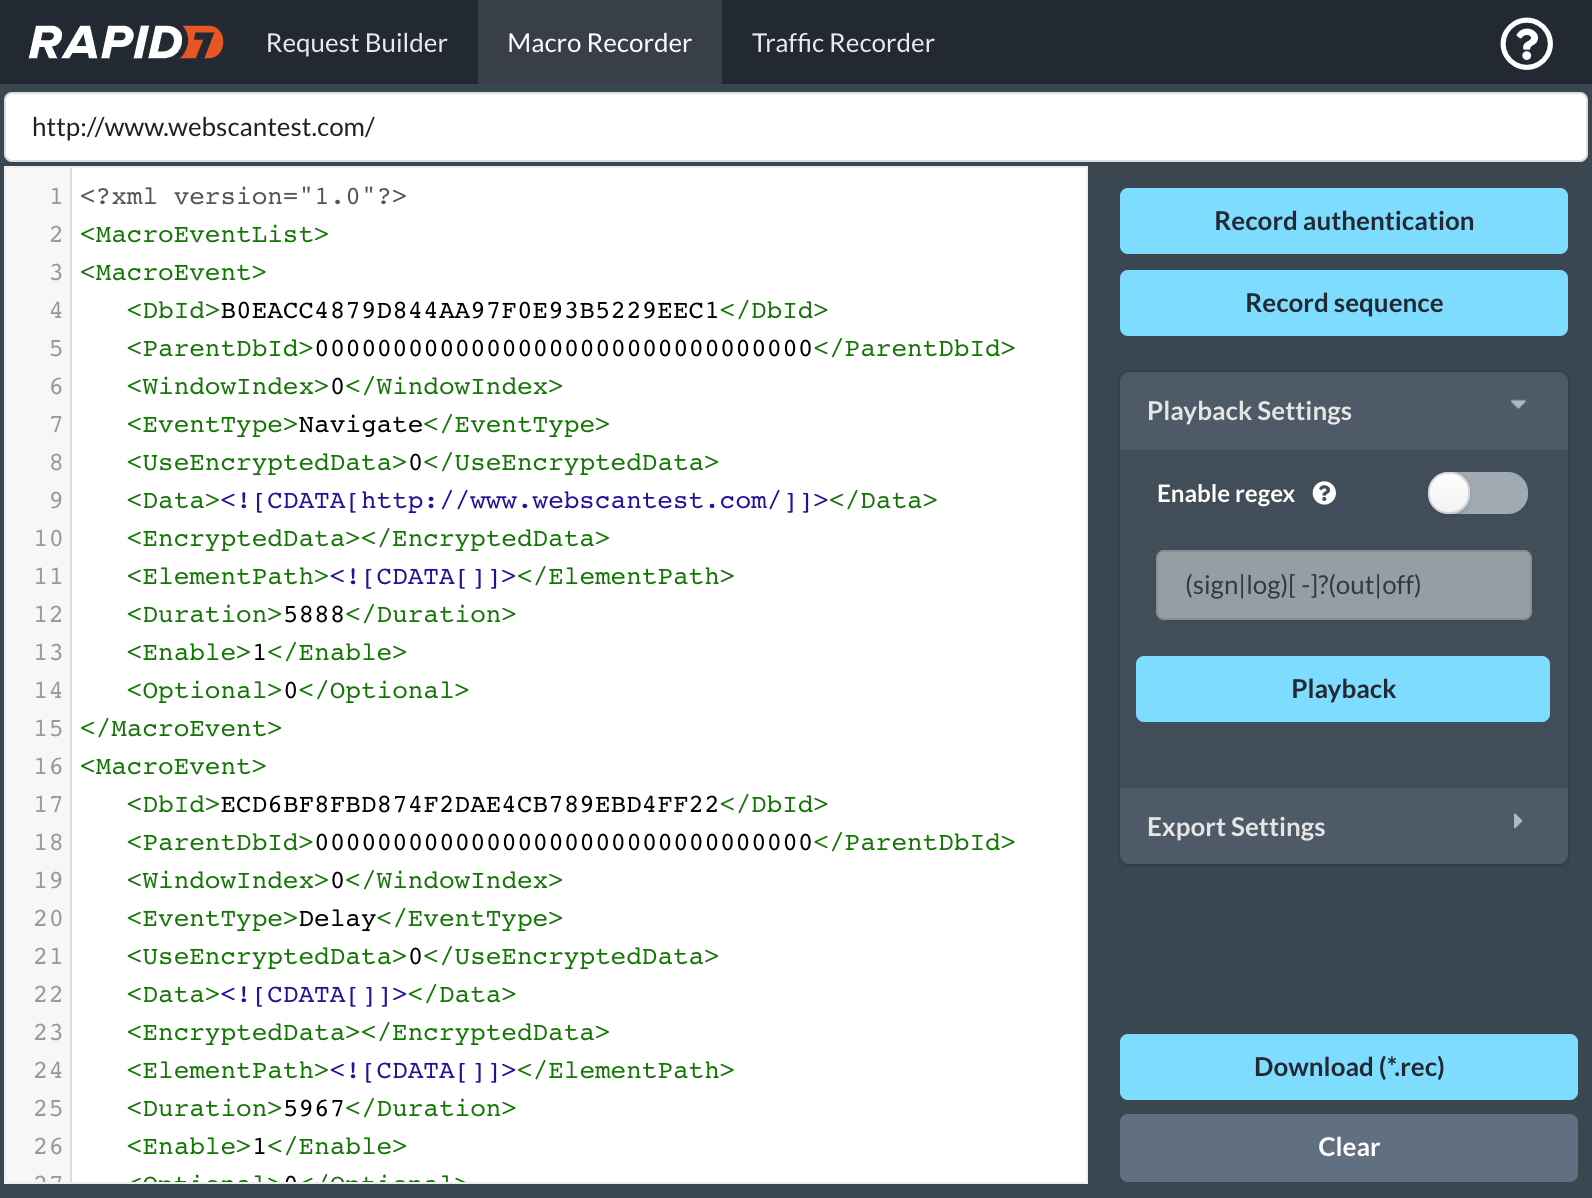
- Once you have the XML content displayed, you should be able to use the macro as is.
How do I use my macro?
After following the steps in the “How do I record a Macro?” section, you can click on the Download button if you haven’t done so already. The Macro recording has the file extension as “.rec” and is in XML format.
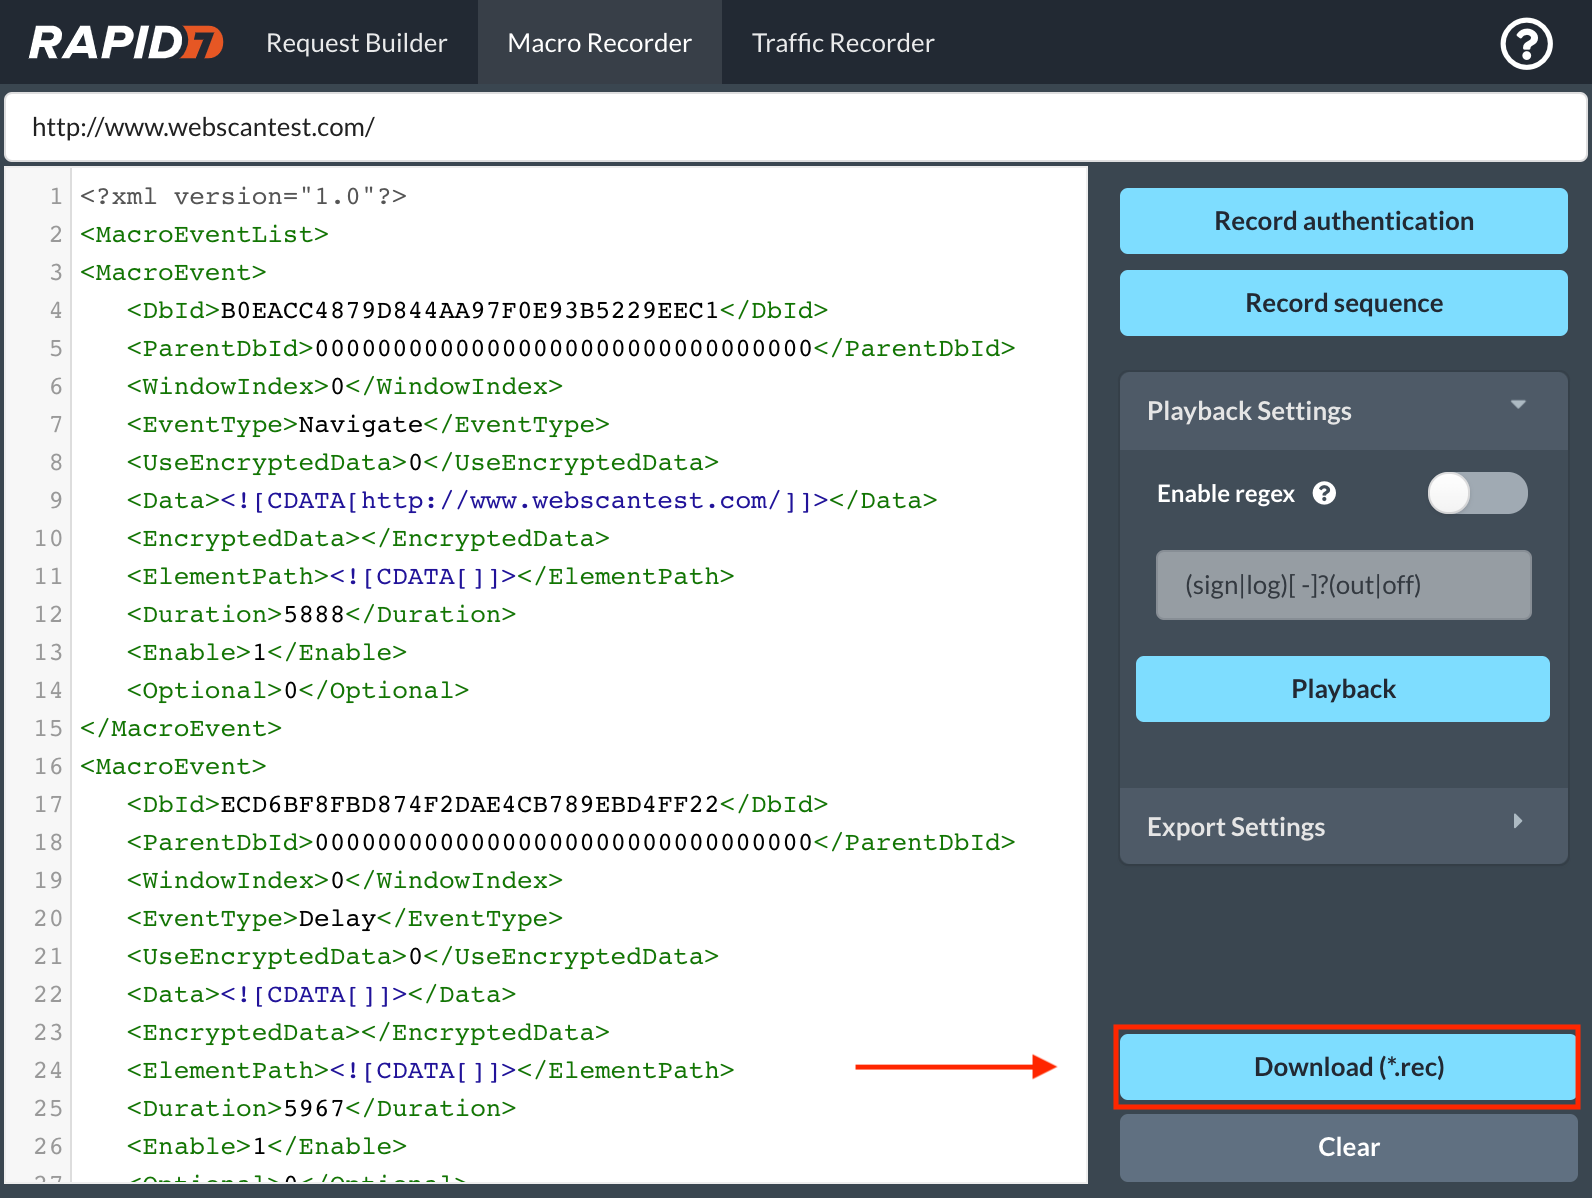
A few things to keep in mind while downloading this macro are:
- Change the name of the macro to reflect proper tracking. A naming convention can be “ApplicationName_MacroAuth”, so that you know this macro file is specifically for authenticating to a particular application.
- A macro file contains a password. A best practice is to keep it as safe and secure as if you had a password in plain text.
The best way to test a macro is to use it in a scan. Depending on the product (InsightAppSec or AppSpider) being used, you can upload it in your scan configuration:
- In InsightAppSec:
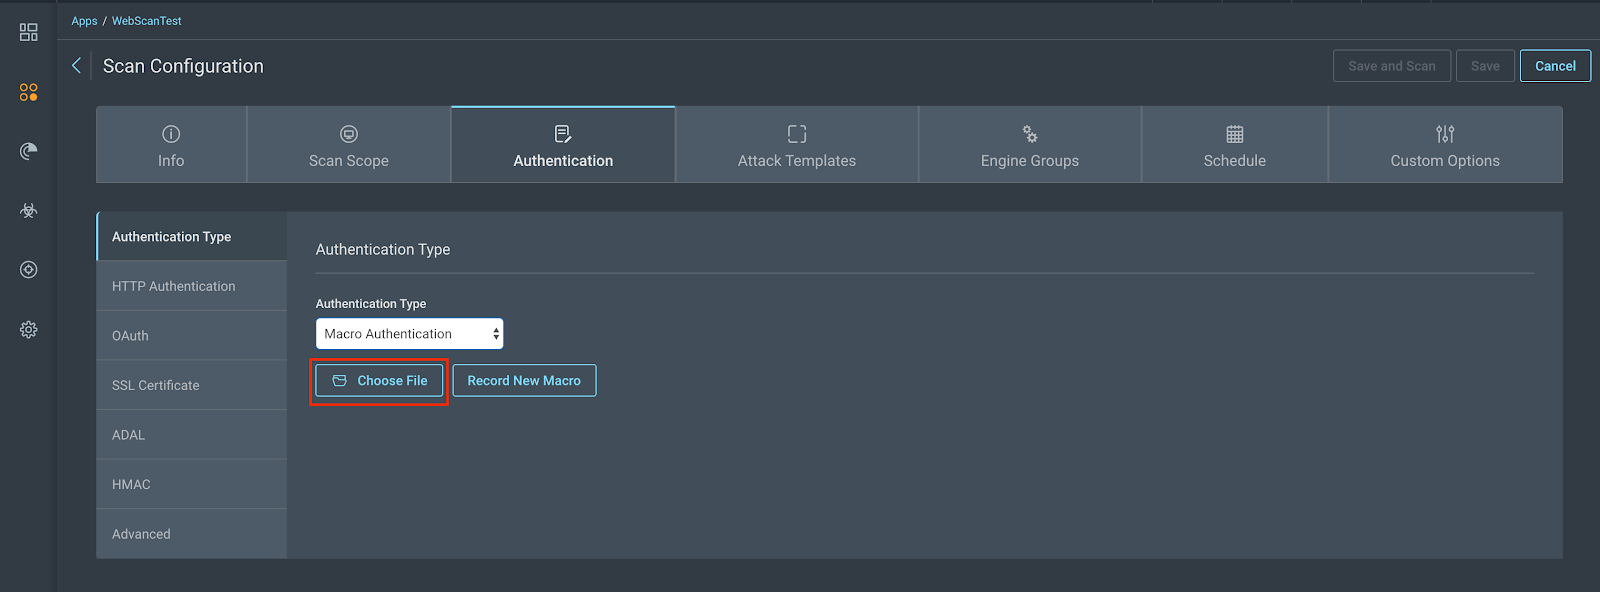
There is a “Record New Macro” button there, but for instances where you need to modify macros, it is best to use the R7AP as you have access to the XML file that can be modified. Note that macros can’t currently be downloaded once uploaded into InsightAppSec, since they contain a password.
- In AppSpider Pro Edition:
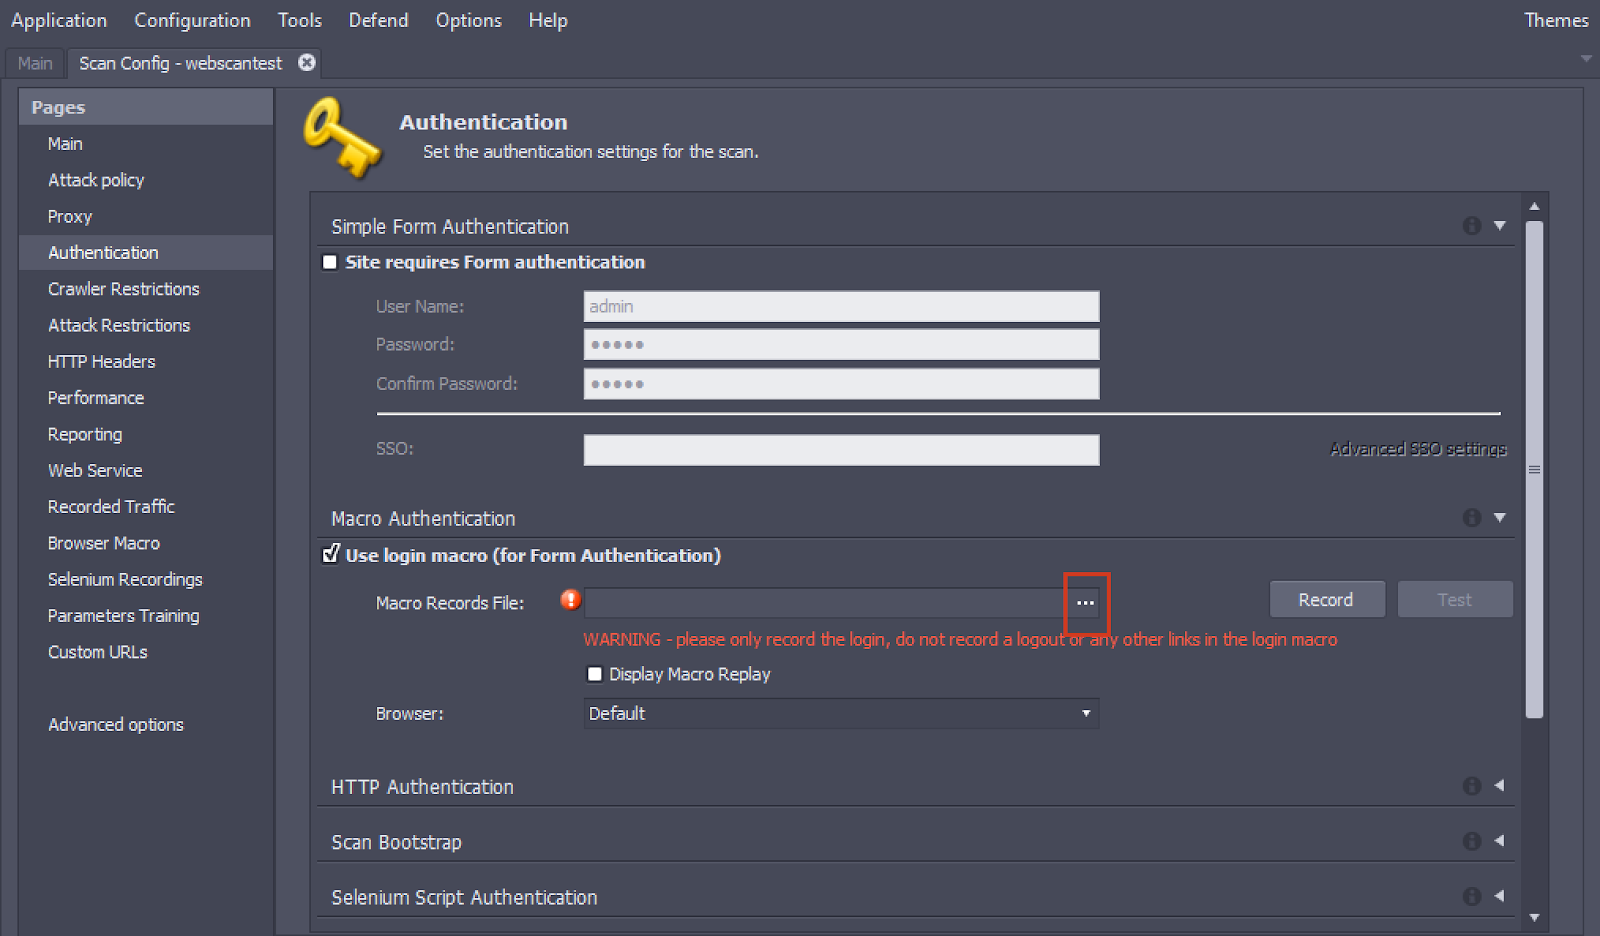
There is a Record button here as well, but since you already have a macro authentication file, there is no need to record another one here.
- In AppSpider Enterprise:
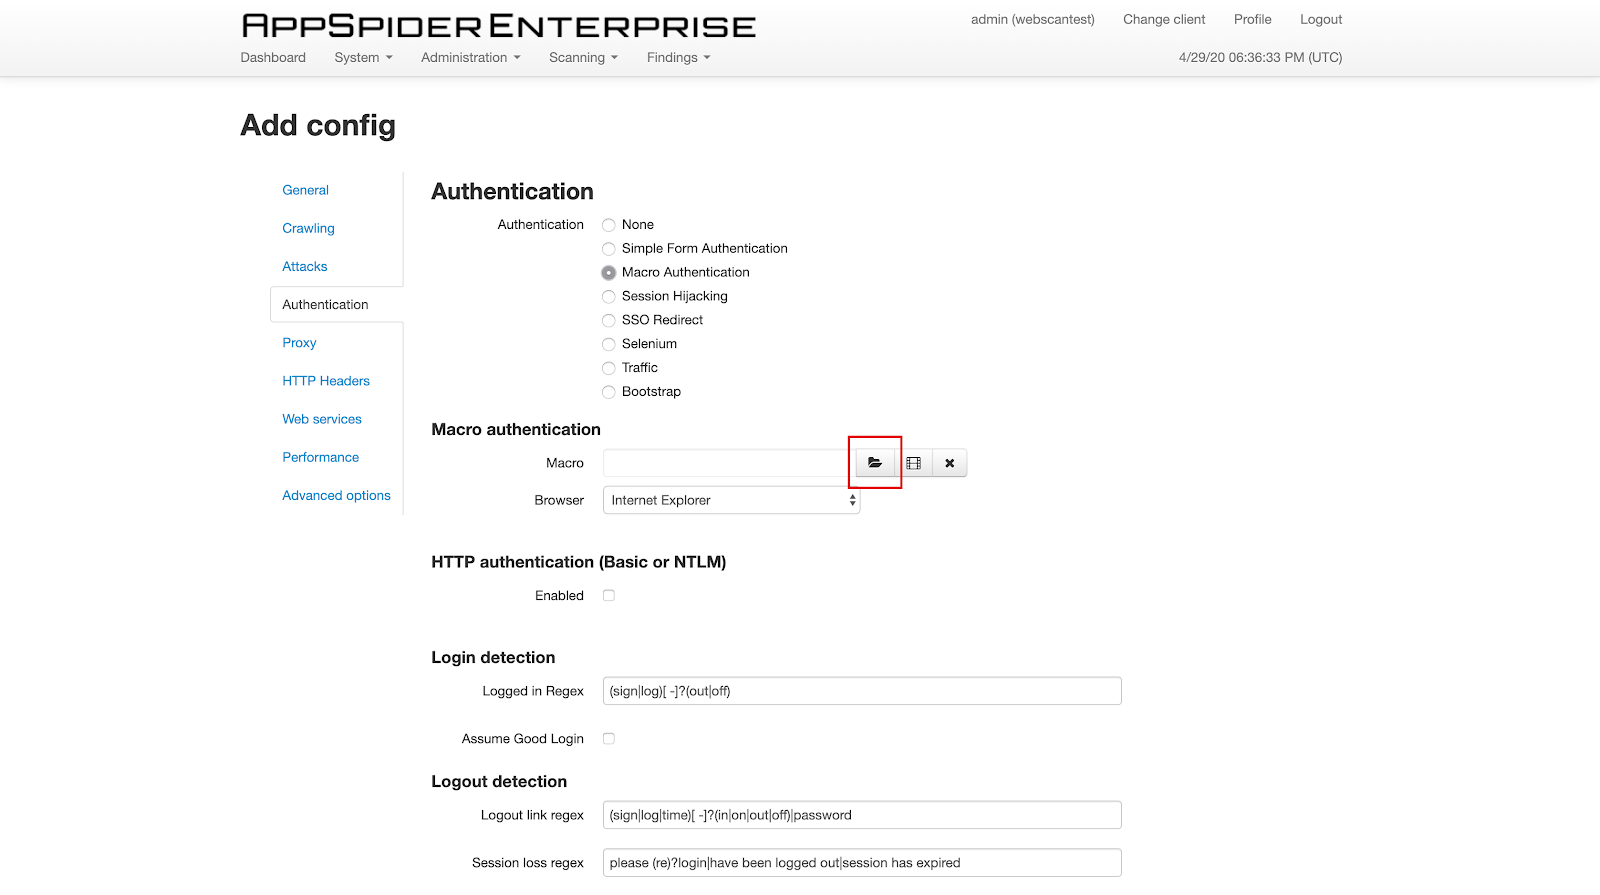
Again, importing the Macro Authentication file (.rec) created from the R7AP is recommended.
Once the macro is imported, verify other scan configuration settings which you may have been working on, and save and scan. If this is your first time running a scan on your application, it would be recommended to run a Crawl Only scan by going to the Attack Templates/Policy option and choosing Crawl Only. This will help you to understand what parts of your application are reachable after authentication is successful and whether the scan configuration needs to be tweaked to help increase coverage.
Was your scan with macro authentication successful? Great job! If not, read on to learn how to troubleshoot.
What are the MacroEvent components?
Before we jump into how to troubleshoot a macro, it is important to understand what each component of a macro is.
For this use case, we will be looking at the aforementioned macro created for authenticating into WebScanTest.
Below is the first <MacroEvent>, which we will use to understand important components of the macro and look in to see which one we can consider changing and when.
<MacroEvent>
   <DbId>16A323EC34B6490CB9E1DBCFE43BD44E</DbId>
   <ParentDbId>00000000000000000000000000000000</ParentDbId>
   <WindowIndex>0</WindowIndex>
   <EventType>Navigate</EventType>
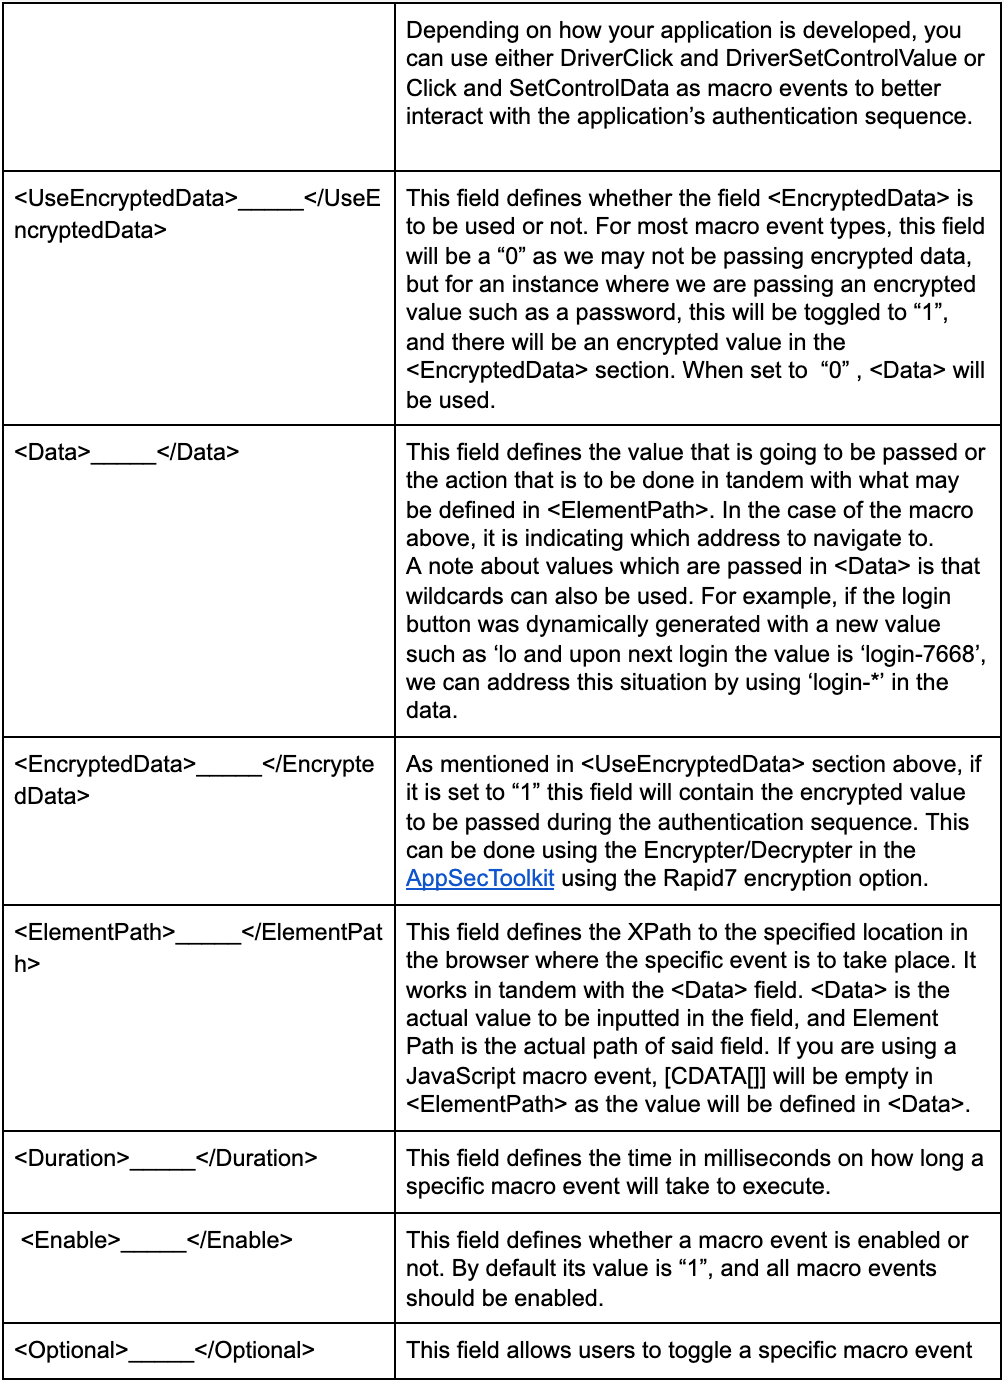
   <UseEncryptedData>0</UseEncryptedData>
   <Data><![CDATA[http://www.webscantest.com/]]></Data>
   <EncryptedData></EncryptedData>
   <ElementPath><![CDATA[]]></ElementPath>
   <Duration>5547</Duration>
   <Enable>1</Enable>
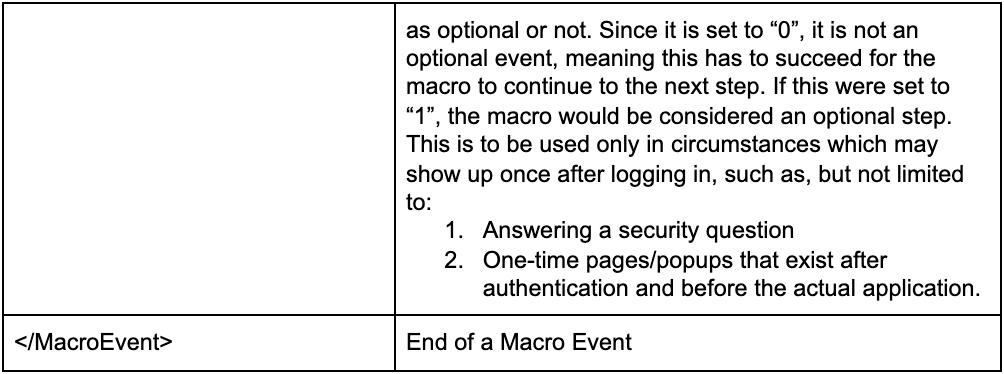
   <Optional>0</Optional>
</MacroEvent>
Let’s break it apart in a table to better understand this Macro Event:
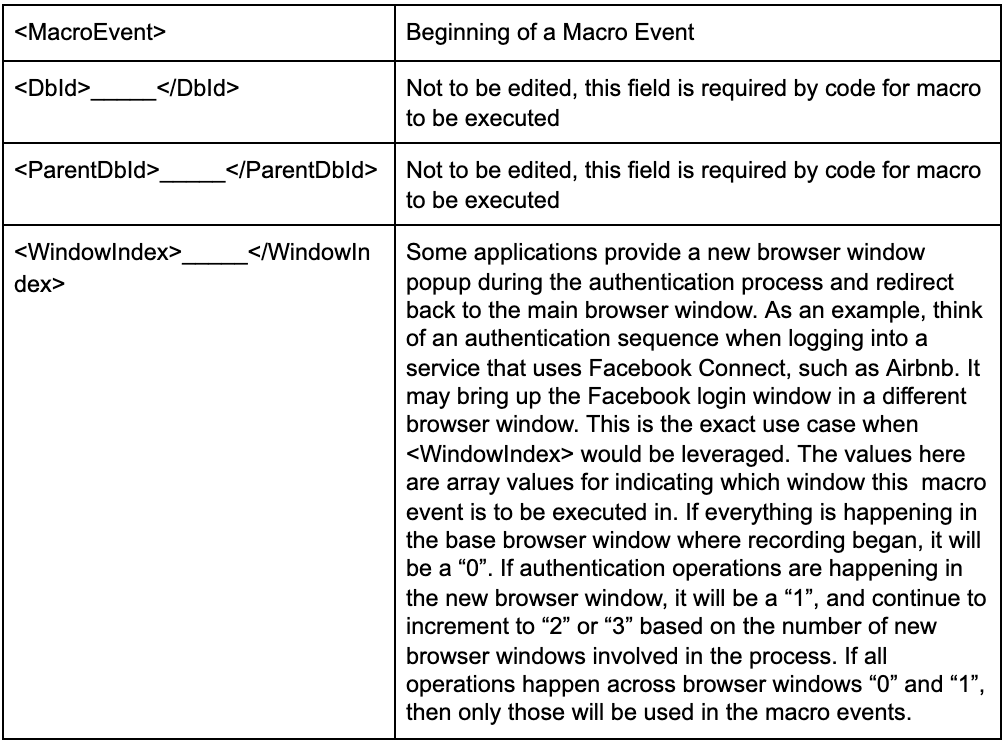
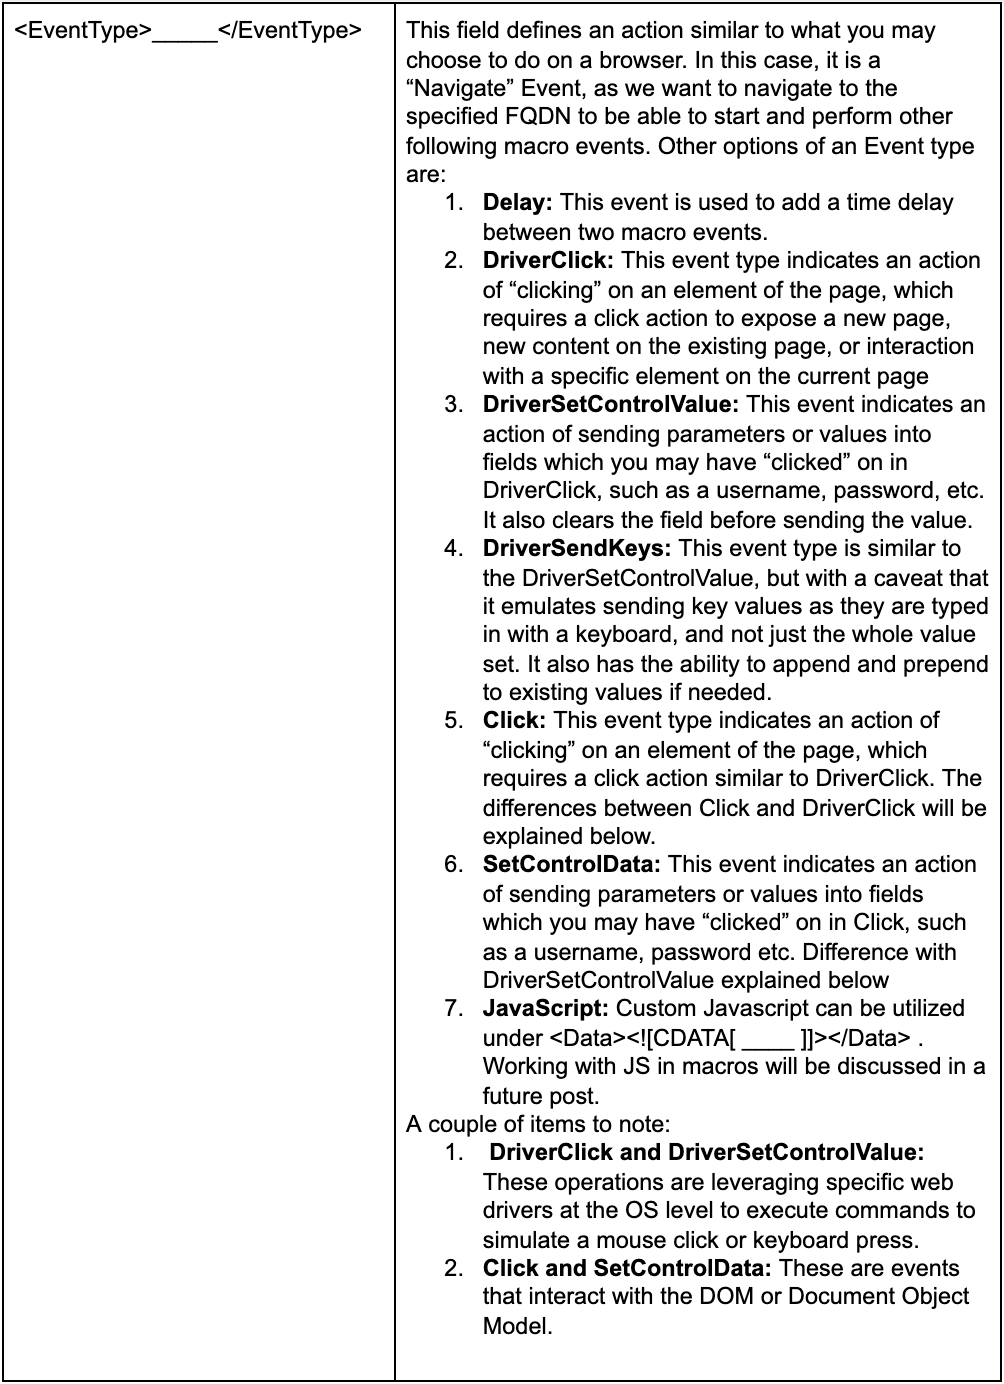
So far, we have discussed the basics of why, when, and how we are to use a macro for authentication in regards to solving our authentication needs when using InsightAppSec or AppSpider. We also covered details in understanding the various macro events as they are important and will set the groundwork for better understanding how to troubleshoot macro authentication in the event of a failure.
If you’ve read this far and still haven’t been successful in testing your macro for authentication, you’re in luck! We will cover this topic in our next blog post on how to do basic troubleshooting of a macro authentication recording. Stay tuned for part two, which will be released in a couple of weeks!


